mirror of
https://github.com/rubickCenter/rubick
synced 2025-08-01 06:59:32 +08:00
177 lines
6.9 KiB
Markdown
177 lines
6.9 KiB
Markdown
## 插件说明
|
||
`rubick` 插件分为 `UI插件` 和 `系统插件` 2类。下面分别介绍这 2 类插件的区别和作用。
|
||
1. UI 插件 <Badge type="tip" text="最常用" />:都会有 UI 界面,用于和用户交互,且需要通过关键词搜索选择进行使用,比如 `斗图` 插件,有界面展示,且需要再搜索框内搜索关键词选择后进行呼起才能使用。
|
||
2. 系统插件:可能不会有 UI 界面,在 `rubick` 启动的时候,会注册执行系统插件。比如`超级面板` 插件,安装完成后,即可在 `rubick` 运行时随时使用,不需要任何关键词和匹配。
|
||
## 开发 UI 插件
|
||
|
||
一个最基础插件的目录是这样的:
|
||
```
|
||
rubick-plugin-demo
|
||
|-- index.html
|
||
|-- package.json
|
||
|-- preload.js
|
||
```
|
||
### 文件说明
|
||
#### package.json
|
||
用于指定插件最基础的配置,一个最基础的配置信息如下:
|
||
```json
|
||
{
|
||
"name": "rubick-ui-plugin-demo",
|
||
"pluginName": "插件demo",
|
||
"description": "rubick ui 插件demo",
|
||
"author": "muwoo",
|
||
"main": "index.html",
|
||
"logo": "https://www.img/demo.png",
|
||
"version": "0.0.1",
|
||
"preload":"preload.js",
|
||
"homePage": "https://gitee.com/rubick-center/rubick-ui-plugin-demo/raw/master/README.md",
|
||
"pluginType": "ui",
|
||
"features": [
|
||
{
|
||
"code": "index",
|
||
"explain": "测试插件",
|
||
"cmds":[
|
||
"demo",
|
||
"测试"
|
||
]
|
||
}
|
||
]
|
||
}
|
||
```
|
||
核心字段说明:
|
||
|
||
* name: 插件 `npm` 包名称,<Badge type="tip" text="必填" />
|
||
* pluginName: 插件显示名称,用于展示给使用者 <Badge type="tip" text="必填" />
|
||
* description: 插件描述,描述这个插件的作用 <Badge type="tip" text="必填" />
|
||
* author: 插件作者
|
||
* main: 入口文件,一般为 `index.html`
|
||
* logo: 尺寸建议 200 * 200, 插件的 logo, 需要是 http/https 在线地址,不支持本地logo <Badge type="tip" text="必填" />
|
||
* version: 插件的版本 <Badge type="tip" text="必填" />
|
||
* preload: 预加载脚本
|
||
* homePage: 插件 readme raw 地址
|
||
* pluginType: 插件类型,枚举:ui, system. 当前选 ui <Badge type="tip" text="必填" />
|
||
* features: 插件核心功能列表 <Badge type="tip" text="必填" />
|
||
* features.code: 插件某个功能的识别码,可用于区分不同的功能 <Badge type="tip" text="必填" />
|
||
* features.explain: 插件某个功能的解释 <Badge type="tip" text="必填" />
|
||
* features.cmds: 输入框内搜索该 cmd 进入插件 <Badge type="tip" text="必填" />
|
||
|
||
#### index.html
|
||
插件的入口文件,用于展示插件的样式,一个最基础的 `html` 结构可以是这样:
|
||
```html
|
||
<!DOCTYPE html>
|
||
<html>
|
||
<body>
|
||
hello Rubick
|
||
<button id="showNotification">通知</button>
|
||
</body>
|
||
<script>
|
||
document.getElementById('showNotification').addEventListener('click', () => {
|
||
window.showNotification();
|
||
})
|
||
</script>
|
||
</html>
|
||
```
|
||
|
||
#### preload.js
|
||
细心的同学可能已经注意到上面的 `index.html` 使用了一个全局函数 `showNotification` 那么这个函数是在哪里定义的呢?
|
||
答案就是在 `preload.js` 里面。`preload.js` 可以为页面提供全局函数
|
||
```js
|
||
window.showNotification = function () {
|
||
rubick.showNotification('HI, rubick')
|
||
}
|
||
```
|
||
rubick 更多支持 API 能力参考:[rubick 全局API](https://github.com/rubickCenter/rubick/blob/master/public/preload.js)
|
||
|
||
### 测试写好的插件
|
||
由于 `rubick` 插件是基于 `npm` 的管理方式,所以开发者调试插件,也是基于 `npm` 的软连接的方式进行调试。
|
||
首先需要再插件 `package.json` 目录下执行:
|
||
```shell
|
||
$ npm link
|
||
```
|
||
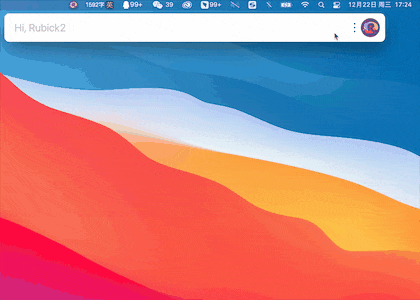
然后将插件通过插件市场的 `开发者` 菜单进行安装,填写插件的 `name` 即可,如果插件需要调试,可以通过右上角 ... 来打开开发者工具进行调试,页面变更直接刷新即可:
|
||
|
||

|
||
|
||
|
||
本小节所有代码:[rubick-ui-plugin-demo](https://gitee.com/rubick-center/rubick-ui-plugin-demo)
|
||
|
||
## 开发系统插件
|
||
|
||
一个最基础插件的目录是这样的:
|
||
```
|
||
rubick-system-plugin-demo
|
||
|-- package.json
|
||
|-- index.js
|
||
```
|
||
### 文件说明
|
||
#### package.json
|
||
用于指定插件最基础的配置,一个最基础的配置信息如下:
|
||
```json
|
||
{
|
||
"name": "rubick-system-plugin-demo",
|
||
"pluginName": "rubick 系统插件demo",
|
||
"version": "0.0.0",
|
||
"description": "rubick 系统插件demo",
|
||
"entry": "index.js",
|
||
"logo": "https://xxxx/upload/202112/08/5bac90649c5343cabb63930b131cf8e6.png",
|
||
"pluginType": "system",
|
||
"author": "muwoo",
|
||
"homepage": ""
|
||
}
|
||
```
|
||
核心字段说明:
|
||
|
||
* name: 插件 `npm` 包名称,<Badge type="tip" text="必填" />
|
||
* pluginName: 插件显示名称,用于展示给使用者 <Badge type="tip" text="必填" />
|
||
* description: 插件描述,描述这个插件的作用 <Badge type="tip" text="必填" />
|
||
* author: 插件作者
|
||
* entry: 入口文件,一般为 `index.js`
|
||
* logo: 尺寸建议 200 * 200, 插件的 logo, 需要是 http/https 在线地址,不支持本地logo <Badge type="tip" text="必填" />
|
||
* version: 插件的版本 <Badge type="tip" text="必填" />
|
||
* homePage: 插件 readme raw 地址
|
||
* pluginType: 插件类型,枚举:ui, system. 当前选 system <Badge type="tip" text="必填" />
|
||
|
||
#### index.js
|
||
插件的入口文件,用于 rubick 主进程进行加载执行:
|
||
```js
|
||
module.exports = () => {
|
||
return {
|
||
onReady(ctx) {
|
||
const { Notification } = ctx;
|
||
new Notification({
|
||
title: "测试系统插件",
|
||
body: "这是一个系统插件,在rubick运行时,立即被加载"
|
||
}).show()
|
||
}
|
||
}
|
||
}
|
||
```
|
||
`index.js` 需要返回一个包含 `onReady` 生命周期的函数,该函数接受 `ctx` 对象作为参数,我们可以通过 `ctx` 使用 `electron` 主进程所有能力。
|
||
同时也为 `ctx` 上扩展挂在了 `mainWindow` 对象。
|
||
|
||
#### 调试插件
|
||
由于 `rubick` 插件是基于 `npm` 的管理方式,所以开发者调试插件,也是基于 `npm` 的软连接的方式进行调试。
|
||
首先需要再插件 `package.json` 目录下执行:
|
||
```shell
|
||
$ npm link
|
||
```
|
||
然后将插件通过插件市场的 `开发者` 菜单进行安装,填写插件的 `name` 即可。由于插件依赖于主进程启动执行,所以安装完成后需要重启 rubick 后才能生效。
|
||
|
||
|
||
|
||
::: danger
|
||
系统插件目前无法直接通过 `devtools` 进行调试,后面会进行优化
|
||
:::
|
||
|
||
## 发布插件
|
||
|
||
这里介绍完了如何开发插件,最后非常欢迎为 `rubick` 贡献开源插件,发布插件也非常简单,首先需要把自己的插件发布到 `npm` 仓库:
|
||
|
||
```shell
|
||
$ npm publish
|
||
```
|
||
|
||
然后再给 [rubick-database/plugins/total-plugins.json](https://gitcode.net/rubickcenter/rubick-database/-/blob/master/plugins/total-plugins.json) 仓库提个 `pull request`, 把你的 `package.json` 信息加入 `json` 文件内,等我们 merge 了您的提交,插件将会自动上架。
|
||
|
||
|